Welcome to exercise 4 of the Advanced Flow for Agentforce Superbadge. In this exercise we’ll develop a process that evaluates how the customer felt about their conversation with the Capricorn Coffee agent. We’ll be creating a prompt that will summarize the entire message, create a flow that will run the prompt and call a flow that will provide a discount voucher for the customer.
If you missed Exercise I please click here: https://howtoagentforce.com/2025/08/11/how-to-finish-exercise-i-create-agent-esso-of-the-superbadge-advanced-flow-for-agentforce/
If you missed Exercise II please click here: https://howtoagentforce.com/2025/08/19/how-to-finish-exercise-ii-configure-customer-verification-for-ai-interactions-of-the-superbadge-advanced-flow-for-agentforce/
If you missed Exercise III please click here: https://howtoagentforce.com/how-to-finish-exercise-3-refactor-a-flow-for-agentforce-compatibility-for-the-advanced-flow-for-agentforce-superbadge/
Here’s the link to the Superbadge trail for the Advanced Flow for Salesforce:
https://trailhead.salesforce.com/content/learn/superbadges/superbadge-flow-for-agentforce
Step 1: Create a Messaging Session Conversation Flow

(1) In Setup search for Flow.
(2) Click on Flows.
(3) Select New Flow.
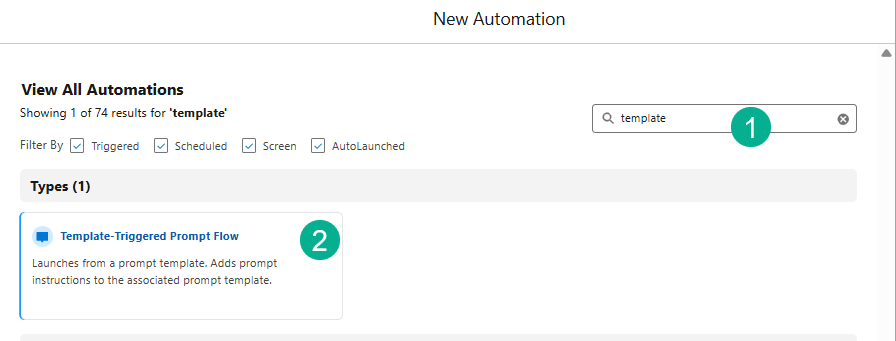
(1) In the search box type in: Template.
(2) Select Template-Triggered Prompt Flow.

(1) Select Automatic Inputs.
(2) Select Record Summary Template Capability.
(3) Search for and select Messaging Session.
(4) Check the X as you have completed configuring the trigger.
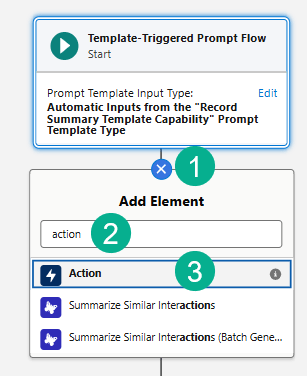
(1) Click on the plus sign after the trigger.
(2) Search for Action.
(3) Select the Action activity.
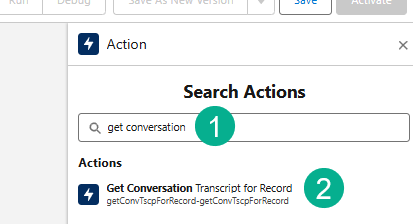
(1) Search for Get Conversation.
(2) Select Get Conversation Transcript for Record.

(1) For the label enter: Get Conversation Transcript.
(2) The API name should automatically appear.
(3) Enter the description: Calls an action to get the conversation transcript associated with the messaging session passed into the flow as part of the prompt template input. Stores the results in Outputs from Get_Conversation_Transcript.
(4) In the Record ID.
(5) Type in “prompt”.
(6) Select Prompt Template Input.
(7) Select “MessagingSession”.
(8) Scroll down and select “Messaging Session ID.”
(9) Click Save to save the Flow.
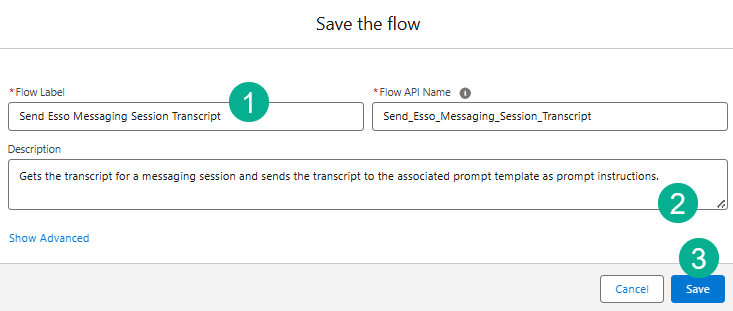
(1) For the label use: Send Esso Messaging Session Transcript.
(2) For the description paste in: Gets the transcript for a messaging session and sends the transcript to the associated prompt template as prompt instructions.
(3) Select “Save”.

(1) Next click on the plus circle below the Action just created.
(2) Select “Add Prompt Instructions”.
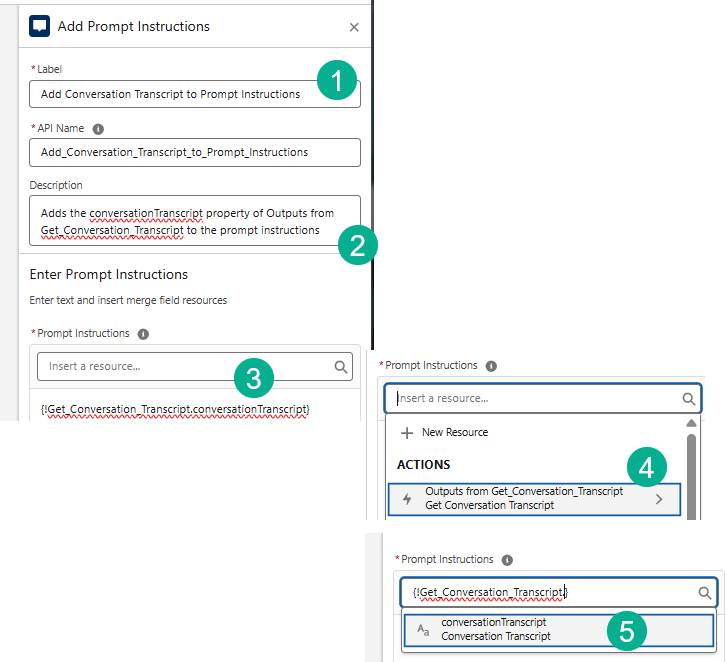
(1) Paste into the label: Add Conversation Transcript to Prompt Instructions
(2) Paste in the description: Adds the conversationTranscript property of Outputs from Get_Conversation_Transcript to the prompt instructions.
(3) The prompt instructions should look like this once you follow these steps.
(4) Click on “Insert a resource…” and select “Outputs from Get_Conversation_Transcript”.
(5) Select “Conversation Transcript”.
Save the flow. Make sure you Activate the flow. That completes this step.
Step 2: Create a Prompt Template that Summarizes a Messaging Session

(1) In Setup search for “Prompt”.
(2) Select Prompt Builder.
(3) Select New Prompt Template.
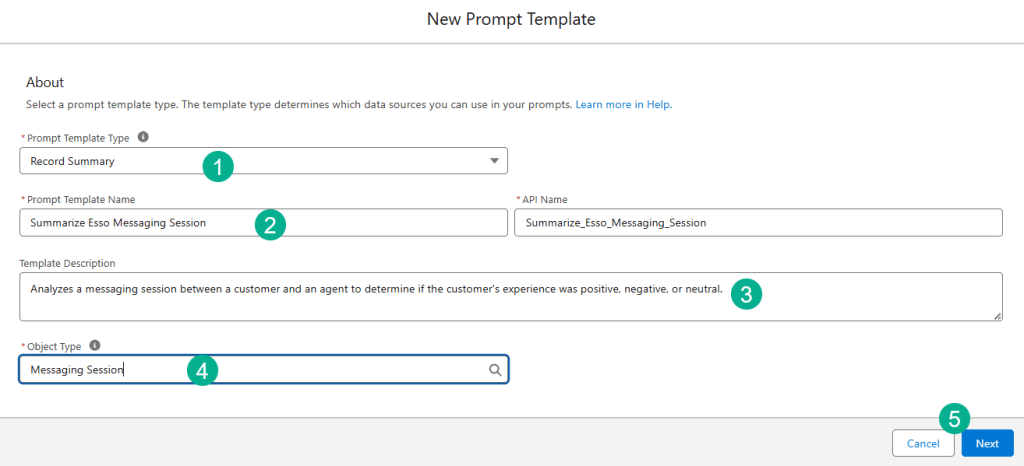
(1) For Prompt Template Type select: Record Summary.
(2) For Prompt Template Name enter: Summarize Esso Messaging Session
(3) For description enter: Analyzes a messaging session between a customer and an agent to determine if the customer’s experience was positive, negative, or neutral.
(4) For Object type search for “Messaging Session”.
(5) Select “Next”.
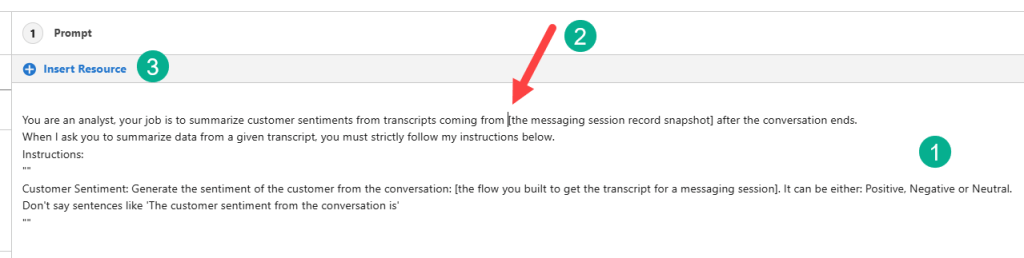
(1) Paste in the prompt provided by Salesforce:
You are an analyst, your job is to summarize customer sentiments from transcripts coming from [the messaging session record snapshot] after the conversation ends.
When I ask you to summarize data from a given transcript, you must strictly follow my instructions below.
Instructions:
“”
Customer Sentiment: Generate the sentiment of the customer from the conversation: [the flow you built to get the transcript for a messaging session]. It can be either: Positive, Negative or Neutral.
Don’t say sentences like ‘The customer sentiment from the conversation is’
“”
(2) Move your cursor to before “The messaging session record snapshot”.
(3) Click Insert Resource.
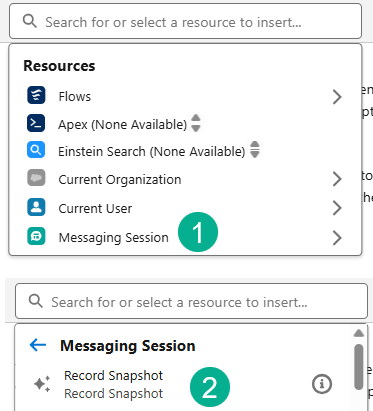
(1) Select Messaging Session.
(2) Click on Record Snapshot.

(1) Remove the curly braces variable in the flow so it should look like this.
(2) Next you’ll want to add the resource for the “the flow you built…” variable.
(3) Select Insert Resource.
(4) Select Flows.
(5) Select the Flow you built above “Send Esso Messaging Session Transcript.”

The final prompt should look like above. Save and Activate the Prompt. That completes this step.
Step 3: Create a Flow that Identifies Customer Sentiment

(1) In Setup search for Flow.
(2) Click on Flows.
(3) Select New Flow.
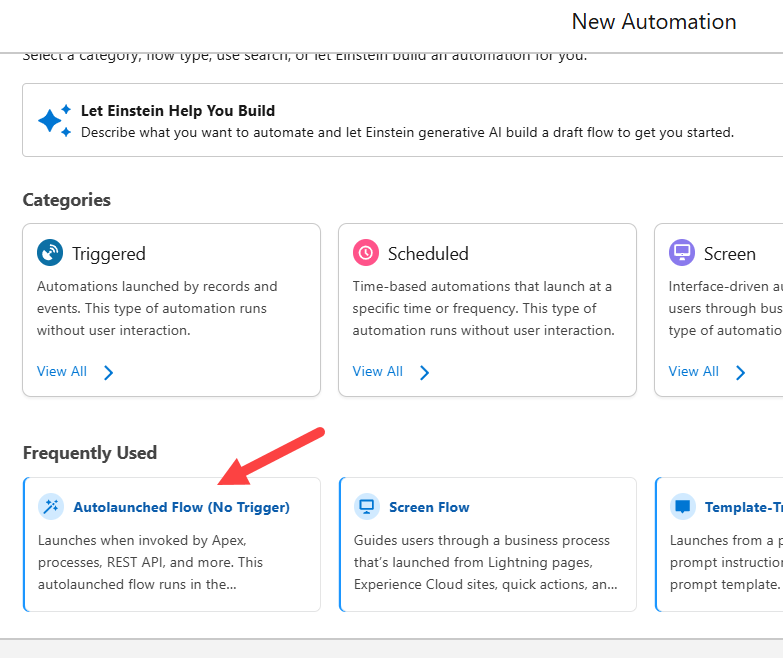
Select Autolaunched Flow.
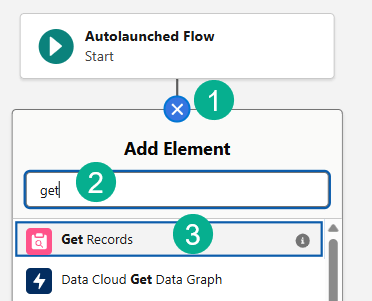
(1) Select the plus sign in the circle right below the trigger.
(2) Search for “Get Records.”
(3) Select Get Records.
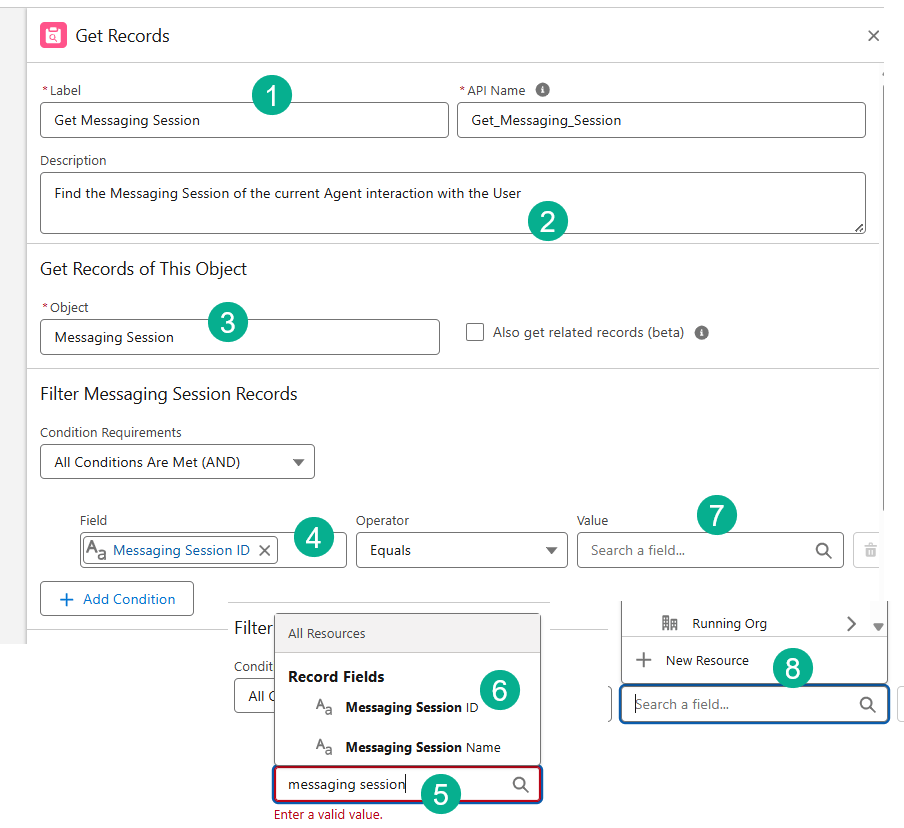
(1) For the Label paste in: Get Messaging Session.
(2) For the description paste in: Find the Messaging Session of the current Agent interaction with the User.
(3) For the object select Messaging Session.
(4) For the field search for Messaging Session which should end up looking like this.
(5) Search for Messaging Session.
(6) Select Messaging Session ID.
(7) For the Value click on the space.
(8) Select “New Resource.”

1.) Select Variable.
2.) Paste in the API Name: messagingSessionId
3.) Paste in the description: This variable stores the messaging session ID.
4.) Select Text for data type.
5.) Select Available for Input.
6.) Select Done.
Save the flow.

1.) For Flow Label enter: Customer Sentiment Handler
2.) For description enter: Reviews customer sentiment based on Messaging Session content, to determine if a customer’s experience with an agent was satisfactory, unsatisfactory, or neutral.
3.) Save the flow.

1.) Next we need to add in an action. Click on the plus sign circle below the Get Messaging Section activity.
2.) Search for Action.
3.) Select Action.

(1) Search for Summarize Esso.
(2) Select Summarize Esso Messaging Session Actions.

1.) Enter in the Label: Summarize Conversation
2.) Enter in the description: Summarize the messaging conversation to get customer sentiment.
3.) The objectToSummarize should look like this.
4.) First select the Messaging Session from Get Message.
5.) And select Entire Resource.
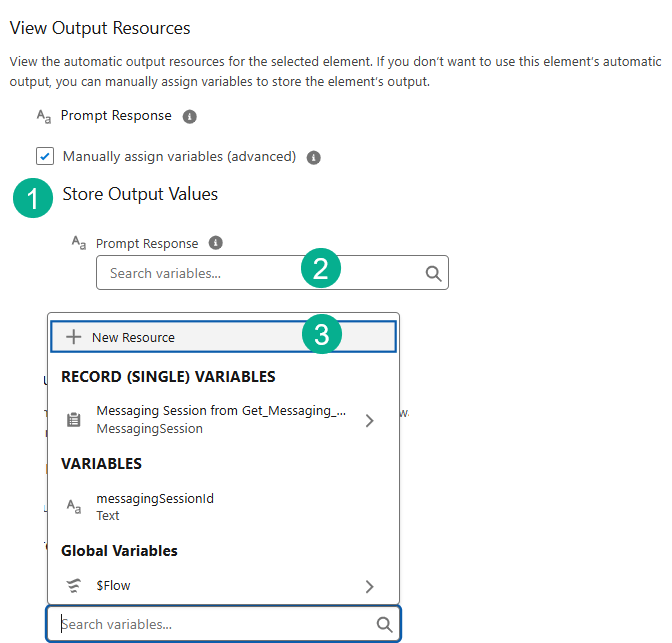
Next we need to add value to store.
1.) Check Manually assign variables.
2.) Click on Prompt response.
3.) Select New Resource.

1.) Select Variable as type.
2.) For name paste in: customerSentiment.
3.) For Description paste in: Holds customer sentiment based on the response from the prompt template.
4.) For Type select Text.
5.) Select Available for Output.
6.) Select Done.
That completes the flow. Save and Activate the flow.
Step 4: Create a Customer Sentiment Analysis Topic

(1) Navigate back to the Esso Agent.
(2) Make sure you deactivate the Agent.
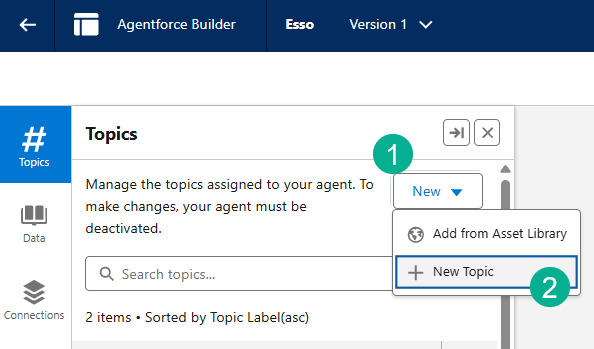
(1) Under Topics, Click New.
(2) Select New Topic.

(1) Enter Name: Customer Sentiment Analysis
(2) Enter Description: Provide appropriate voucher codes based on customer sentiment after creating a refund request record.
(3) Enter Scope: Your job is only to perform customer sentiment analysis at the end of the conversation and provide appropriate voucher codes based on the summarized sentiment.
(4) Enter Instruction #1: After summarizing the refund request and creating a refund request record, call the Customer_Sentiment_Handler action to perform customer sentiment analysis.
(5) Enter Instruction #2: Provide ’50OFF’ voucher code if the customer sentiments are Negative. Provide ’25OFF’ voucher code if the customer sentiments are Neutral. Provide ’15OFF’ voucher code if the customer sentiments are Positive.
(6) You will need to click the Add Instructions button after step 4.
(7) Select Next.
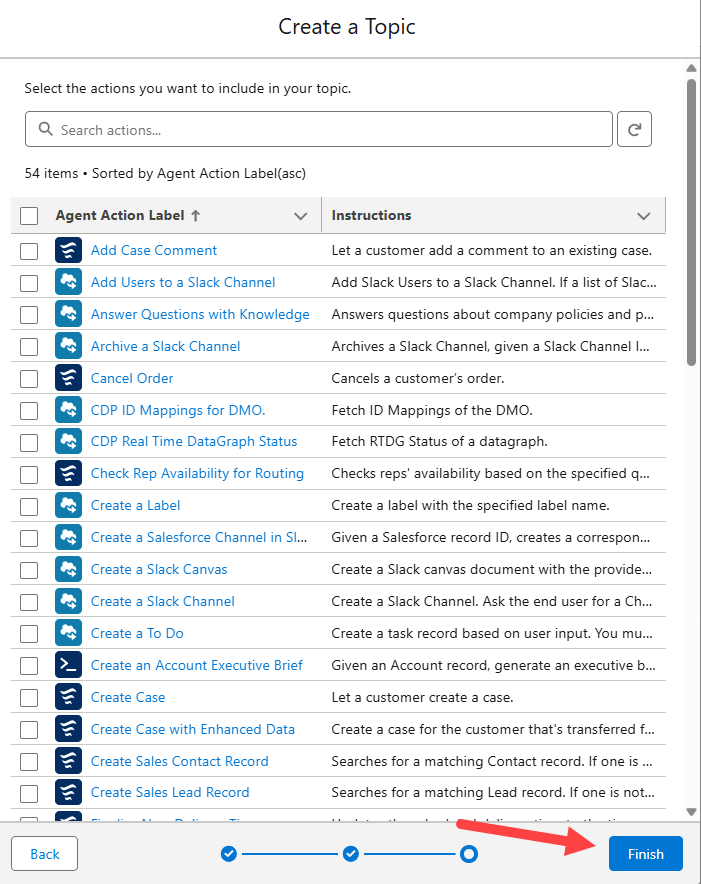
Click Finish.
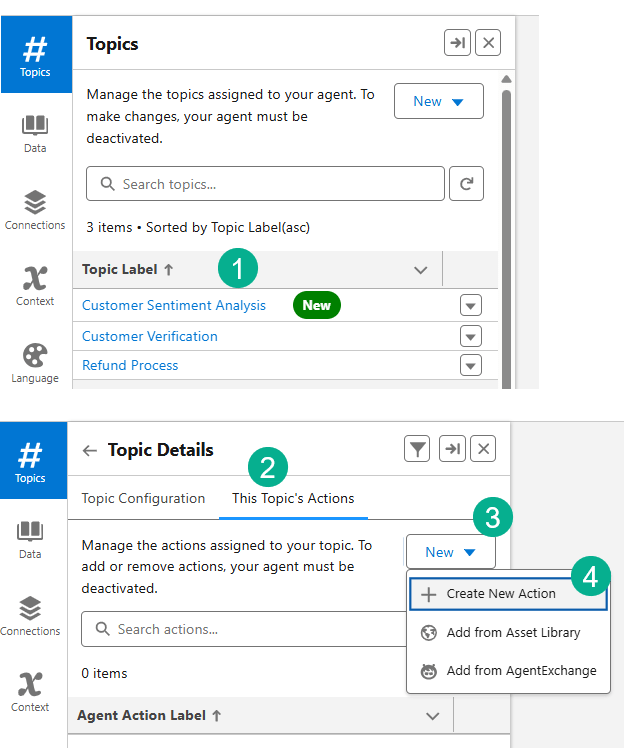
(1) Your new Topic will appear on the list. Select the Topic.
(2) Select the This Topic’s Actions tab.
(3) Click on the New button.
(4) Select Create New Action.

(1) Select Flow as the type.
(2) Search for Customer Sentiment Handler action.
(3) Select Next.
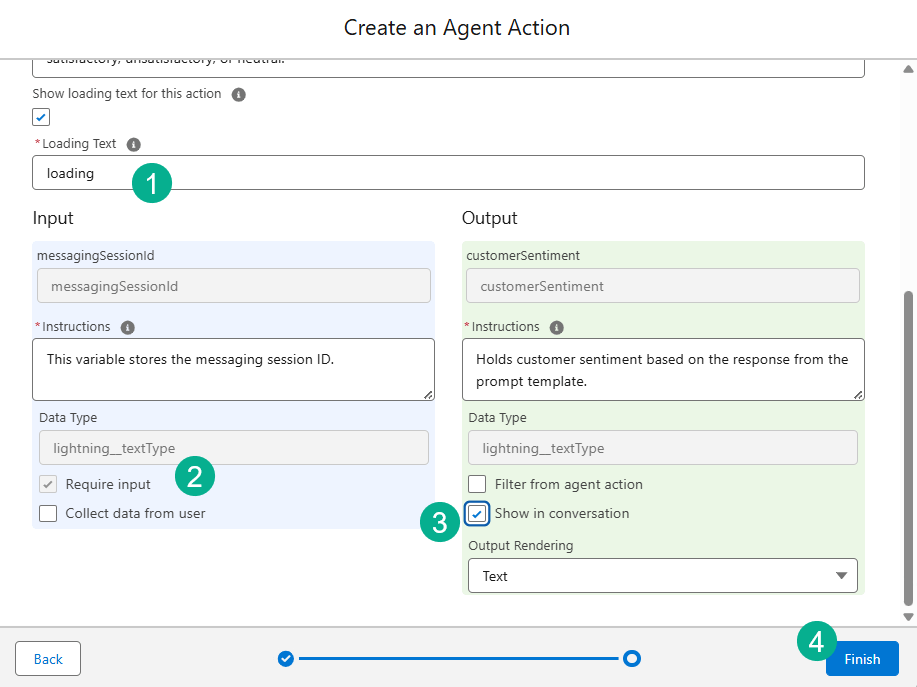
(1) Enter in Loading in the Loading Text.
(2) For messagingSessionID select. Require for Input.
(3) For customerSentiment select Show in conversation.
(4) Select Finish.
Activate the Esso Agent.
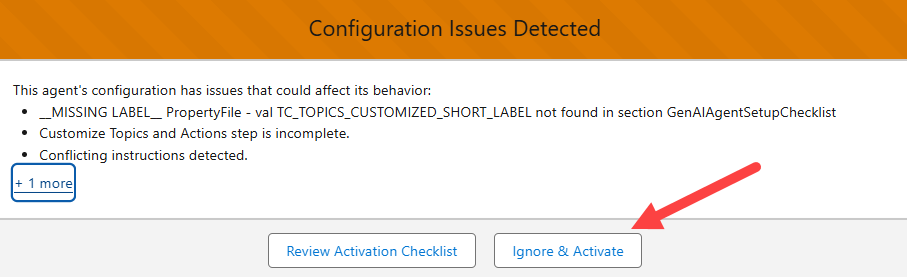
If you receive this message select Ignore & Activate.
Now check to see if you’ve completed the Superbadge.


Congratulations. Look for our next SuperBadge on the Legend Challenge series.
Interested in building a Proof of Concept of an Agent, we can help. Sign up for a free discovery session to build your first Agent. https://howtoagentforce.com/agentforce-agent-poc/
