In this blog you will build a Sales Email template and generate AI driven sales emails with Agentforce. Connecting Sales and Service to marketing automation can be powerful and automating with AI can be even better.
We’ll be following along to the excellent exercises provided by Salesforce at the following link: https://developer.salesforce.com/agentforce-workshop/prompt-builder/3-sales-email
The use case:
You are a resort sales manager at Coral Cloud Resorts and want to reach out to upcoming high value guests to suggest resort experiences that would enhance their experience and add a little profit to the resort.
Can Agentforce help send highly personalized sales emails at a click of a button? Let’s find out!
Step I: Enable Sales Email Templates
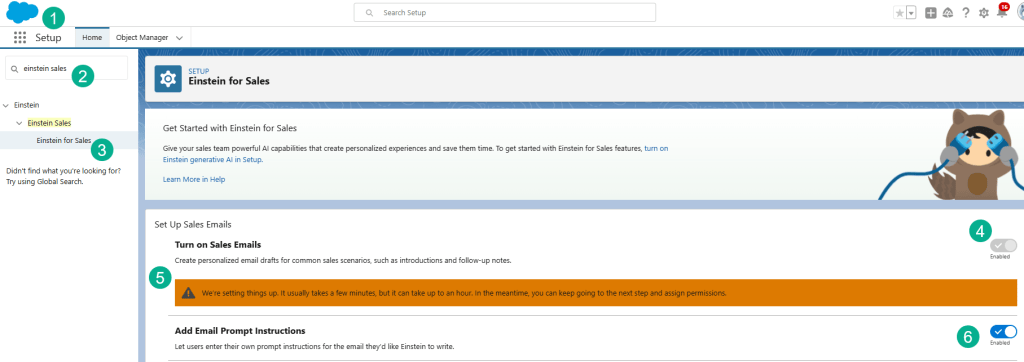
(1) In Setup.
(2) Search for “Einstein for Sales”.
(3) Select Einstein for Sales.
(4) Turn on Sales Emails.
(5) A message will pop up letting you know Einstein is setting things up.
(6) Enable Email Prompt Instructions if they aren’t enabled already.
Step II: Create a flow that grounds a prompt in customer data.
In this part we’ll create a flow that will be used to ground the email prompt so that it can personalize the different experiences based on the guest’s interests.

(1) In Setup.
(2) Search for “Flows”.
(3) Select Flows
(4) Create a New Flow.
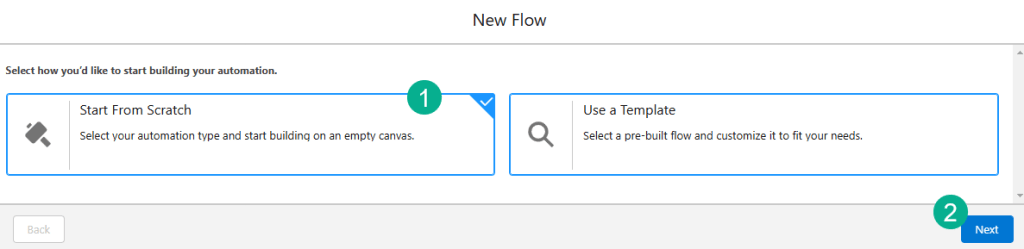
(1) Keep the setting of “Start From Scratch”.
(2) Select Next.

(1) Select Template-Triggered Prompt Flow.
(2) Select Create.
Part A: Fill out the Input Type

(1) Select Automatic Inputs.
(2) Fill in the Prompt Template Type.
(3) Select the Recipient as a Contact.
(4) Leave the Related Objects empty. Here are the values to use below.
| Field | Value |
| Prompt Template Type | Sales Email Template Capability |
| Recipient | Contact |
| Related Object | <leave empty> |
Part B: Get the experiences that match the guest’s interests

(1) Under the Start icon click on the plus sign in the circle.
(2) Select Get Records.
In the panel fill out the fields following these values:
| Field | Value |
| Label | Get Experiences |
| API Name | Keep Default |
| Description | Get a list of resort experiences that match the guest’s interests |
| Data Source | Salesforce Object |
| Object | Experience |
| Condition Requirements | Any condition is Met (OR) |
And then define the three conditions below:
| Field | Operator | Value |
| Type__c | Equals | $Input > Recipient > Interest 1 |
| Type__c | Equals | $Input > Recipient > Interest 2 |
| Type__c | Equals | $Input > Recipient > Interest 3 |
Last under “How to Store Record Data” select “All Records”.
The output should look like this when finished.
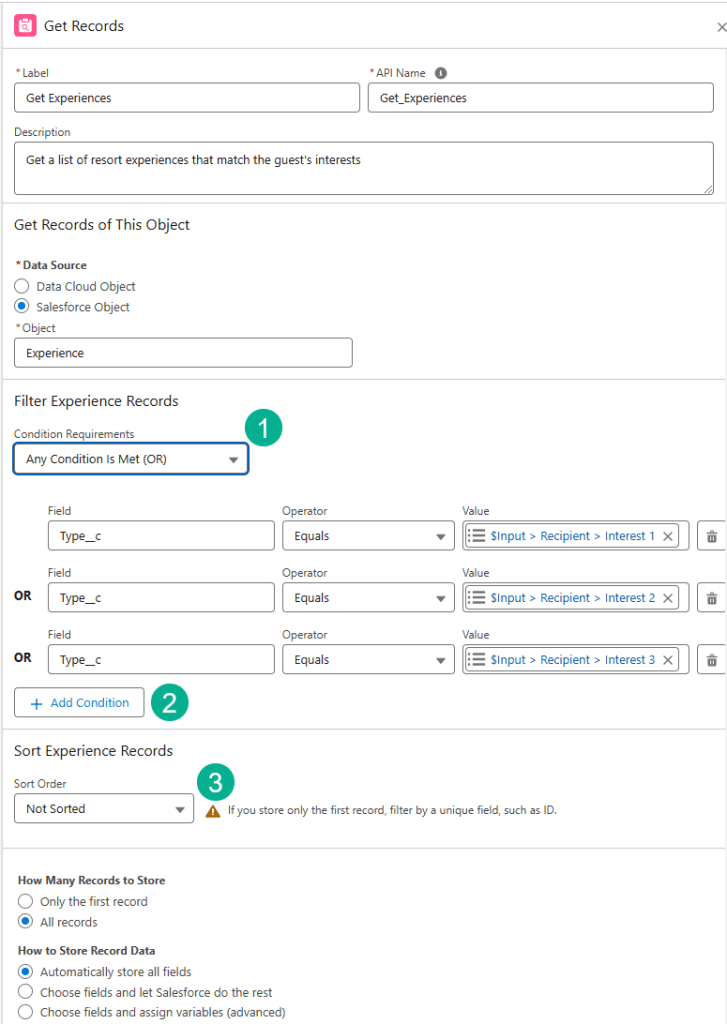
(1) Don’t forget to select “Any Condition is Met (OR).
(2) When adding a new condition click the Add Condition button.
(3) Keep the Sort Order as “Not Sorted”.
Here’s a walkthrough of how to configure the $Input > Recipient > Interest 1

(1) Click on “Add Condition”.
(2) Click on the Value field.
(3) Scroll down in the list until you reach under Global Variables – $Input.

(1) The $Input will appear in the values field.
(2) Select Recipient – Contact.
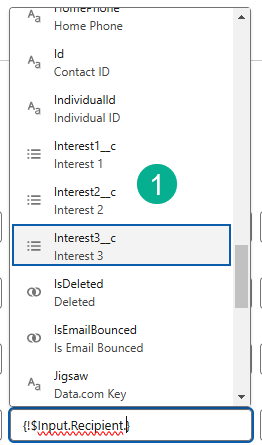
(1) Scroll down and select the Interest1_c.
Save the flow to lock in the work you’ve done so far.

Enter in the following values:
| Field | Value |
| Flow Label | Add Experiences to Prompt |
| Flow API Name | Keep Default |
| Description | Add experiences that match the guest’s interests to the prompt |
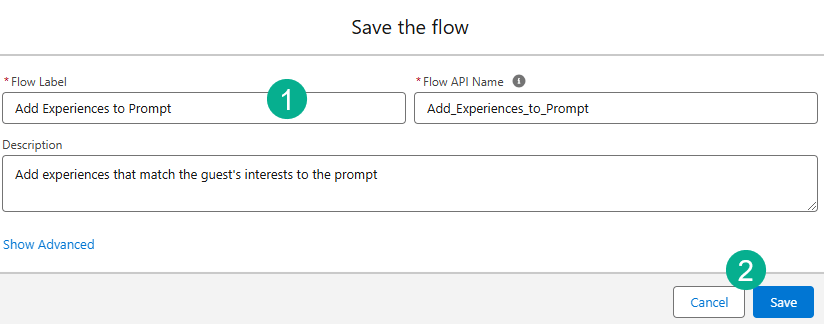
(1) Fill out the fields as listed above.
(2) Click Save.
Part C: Add each matching experience to the prompt:
Under Get Experiences in the flow click on the plus circle to add a new element:

Select a Loop.

And fill in the details as follows:
| Field | Value |
| Label | Experiences Loop |
| API Name | Keep Default |
| Description | Loop through experiences |
| Collection Variable | Experiences from Get_Experiences |
The screen should look like this:
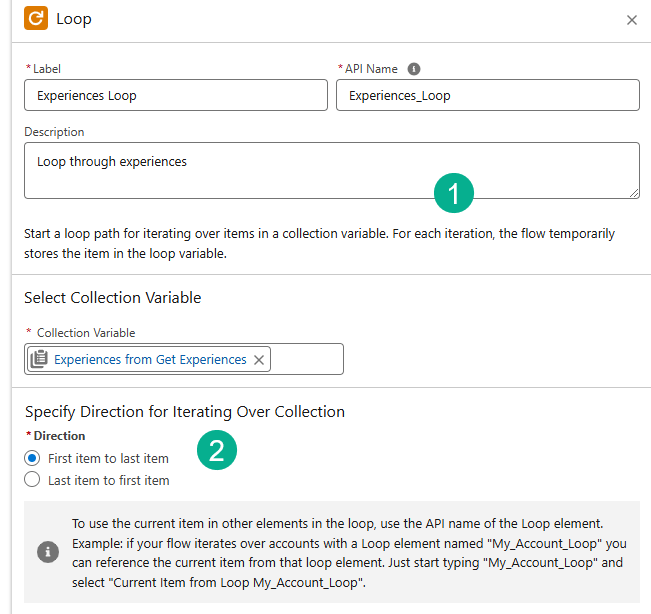
(1) Enter the values listed in the table above.
(2) Keep the default setting for “First item to last item”
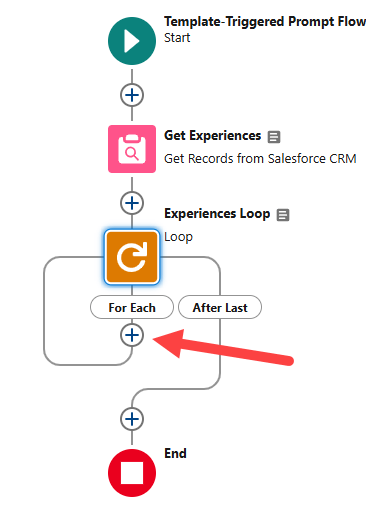
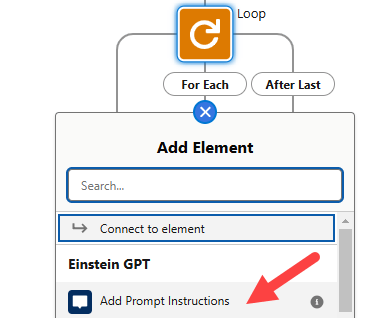
Inside the loop under the “For Each” element click on the Plus button.
Select “Add Prompt Instructions”
In the panel on the right fill in the fields following the table below:
| Field | Value |
| Label | Add Experience to Prompt |
| API Name | Keep Default |
| Description | Add each experience matching guest’s interests to the prompt |
| Prompt Instructions(Resource Picker) | Current Item from Loop Experiences_Loop > Name |
After filling in the element it should look like this:

When you choose your Prompt Instructions make sure the coding looks like above to make sure it’s correct.
Save and Activate the flow.

When finished your flow should look like this:
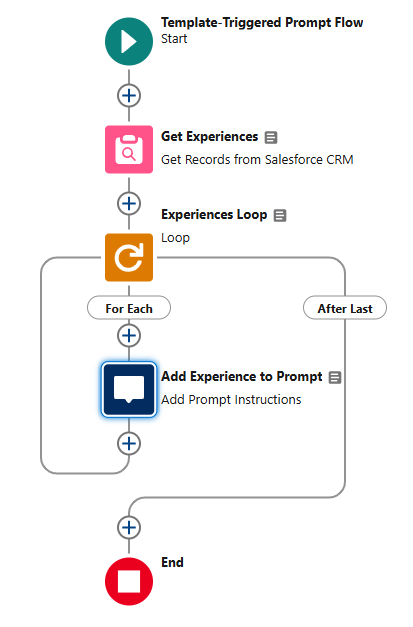
Step III: Create the Sales Email template
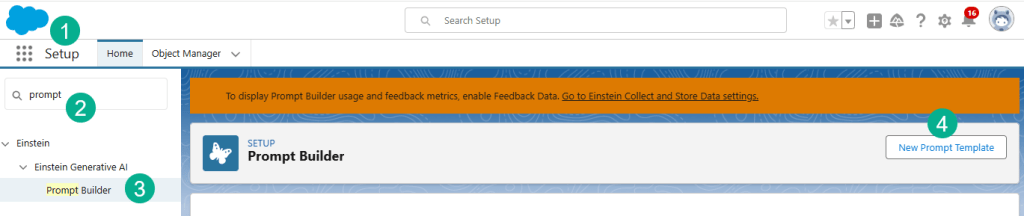
(1) In Setup.
(2) Search for Prompt.
(3) Select Prompt Builder.
(4) Click on “New Prompt Template”
Fill out the Template with the following fields.
| Field | Value |
| Prompt Template Type | Sales Email |
| Prompt Template Name | Welcome Email for Upcoming Trip |
| API Name | Keep default |
| Template Description | This template is used to generate a welcome email for a guest’s upcoming trip. |
| Recipient | Contact |
| Related Object | Leave Blank |
Your Template should look like this:

(1) Fill out the appropriate fields detailed above.
(2) Click Next.
Paste the following into the Prompt Template Workspace:
Your name is SENDER_NAME. You work in the guest success team at ORGANIZATION_NAME, a luxury beachfront resort. Generate an email welcoming the guest for their upcoming stay. Guest name: GUEST_NAME. Check-in date: NEXT_CHECK_IN_DATE. Write a story that paints the picture of infinite possibilities at the resort and that weaves in some of the resort experiences that match the guest’s interests. List of resort experiences matching the guest’s interests: EXPERIENCES.
Now you want to replace all the placeholders in the prompt with values in your data set.
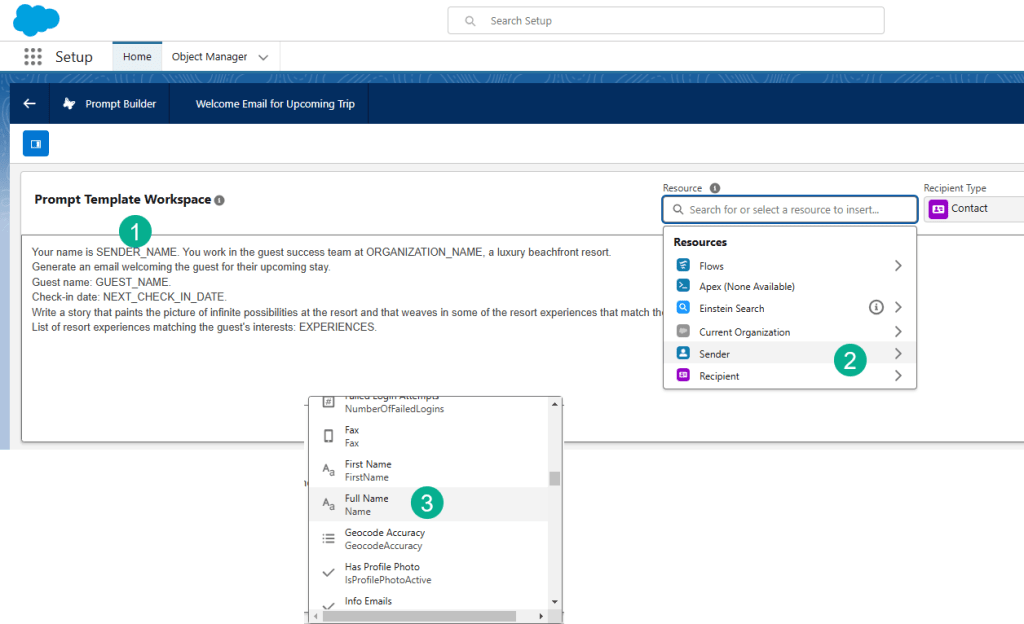
(1) Start with SENDER_NAME.
(2) Under Resources navigate to Sender.
(3) In the pop-up window navigate to and select Full Name.
Follow this chart to populate data points for each personalization point in the email.
| Placeholder | Merge field |
| SENDER_NAME | Sender > Full Name |
| ORGANIZATION_NAME | Current Organization > Name |
| GUEST_NAME | Recipient > Full Name |
| NEXT_CHECK_IN_DATE | Recipient > Next Check-in Date |
| EXPERIENCES | Flow > Add Experiences to Prompt |
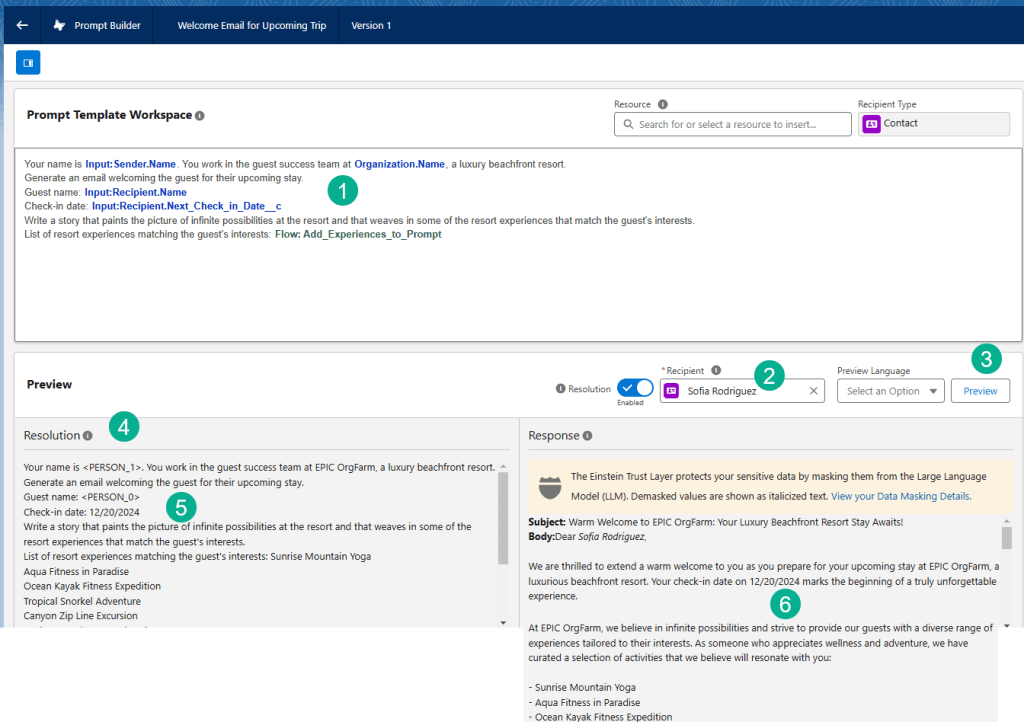
(1) Once you fill in all the variables it should look like the above.
(2) To test out your prompt enter Sofia Rodriguez.
(3) Click Save and Preview.
(4) In the Resolution section.
(5) You’ll see all the data being pulled into the prompt.
(6) And a sample email including all the personalization detailed above.
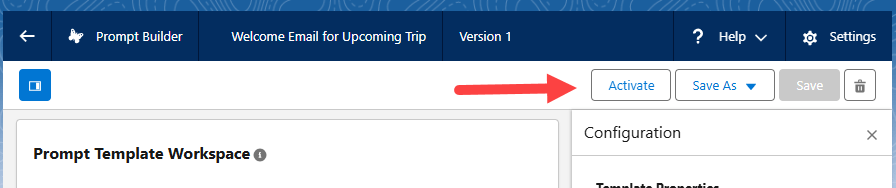
Click Activate once everything looks good.
Step IV: Generate Emails
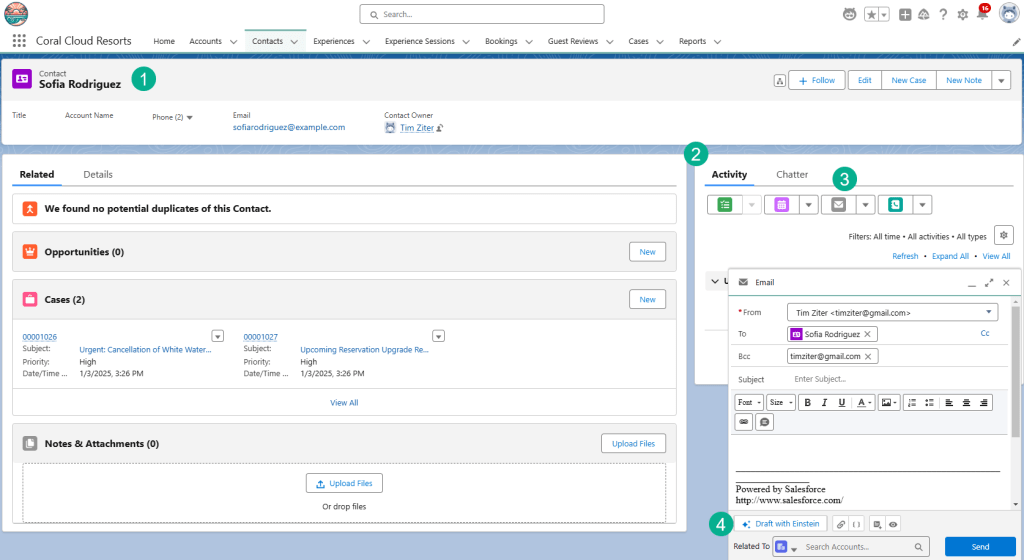
(1) Navigate back to the Coral Cloud Resorts app and navigate to Sofia Rodriguez’s contact record.
(2) On the Activity Tab on the right.
(3) Click on the Email Icon.
(4) Click on the “Draft with Einstein” button.
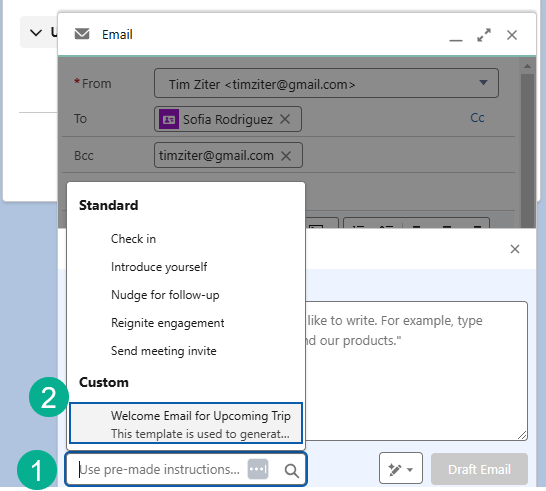
(1) Click on “Use pre-made instructions” window.
(2) Select “Welcome Email for Upcoming Trip”.

(1) View the amazing personalization in the email starting with the guests name.
(2) The Resort name.
(3) The Check-in Date.
(4) And the experiences that match their interests.
In future blogs we’ll cover how to use Agentforce to feed a contact/lead into a Marketing Cloud Journey for a more advanced Marketing Automation experience.
Experiment on your own creating different personalized emails with Agentforce!
#BeAnAgentBlazer!
