Welcome back to part II of the Agentforce Service Superbadge Unit, Create the Booking Management Topic. Let’s work together to help you complete the Agentforce Service Superbadge Unit on your way to become an Agentforce Agentblazer Innovator.
Here’s the link for Exercise I: Set Up the Agent and Einstein Data Library – https://howtoagentforce.com/how-to-complete-the-agentforce-service-superbadge-unit-exercise-i-set-up-the-agent-and-einstein-data-library/
For the link to the Superbadge unit click here: https://trailhead.salesforce.com/content/learn/superbadges/superbadge-agentforce-service-sbu?trail_id=become-an-agentblazer-innovator
Step I: Create the Booking Topic

(1) In Setup.
(2) Search for Agent.
(3) Click on Agentforce Agents.
(4) Select the Coral Cloud Experience Agent.

Click the Open in Builder button.

(1) Under the Topics section.
(2) Select New.
(3) Select New Topic.

(1) Leave this section blank as it will auto populate the rest of the section.
(2) Click Next.

(1) Fill in the topic based on the instructions provided by Salesforce. Note the Topic Label is the Name.
(2) Fill in the Description.
(3) The Scope.
(4) And all four instructions. You’ll need to click on the “Add Instructions” button each time.
(5) Click Next.
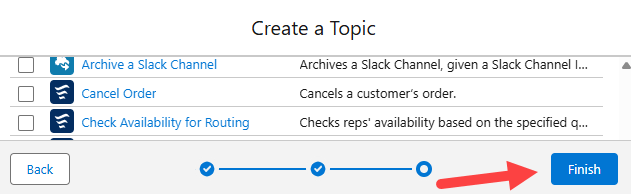
In the next screen click “Finish”.
Step II: Create Get Booking Action
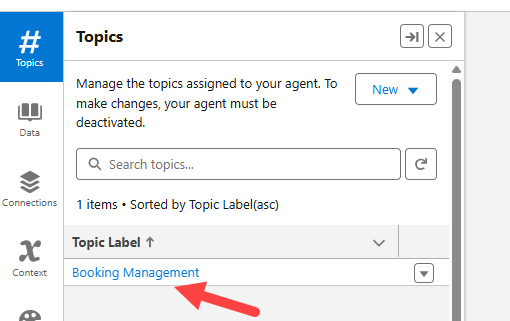
Click back into the Booking Management Topic.
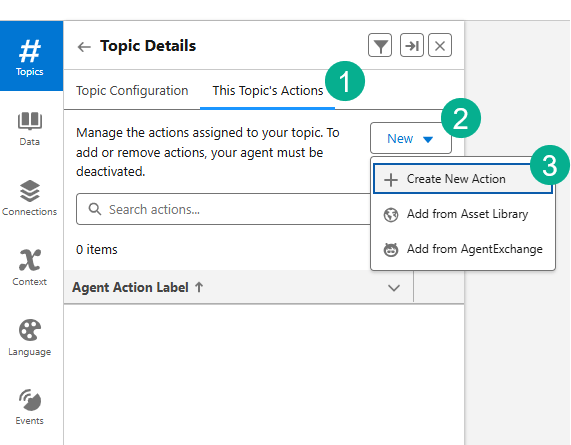
(1) Click on “This Topic’s Actions”.
(2) Click on New.
(3) Click on “Create New Action”.
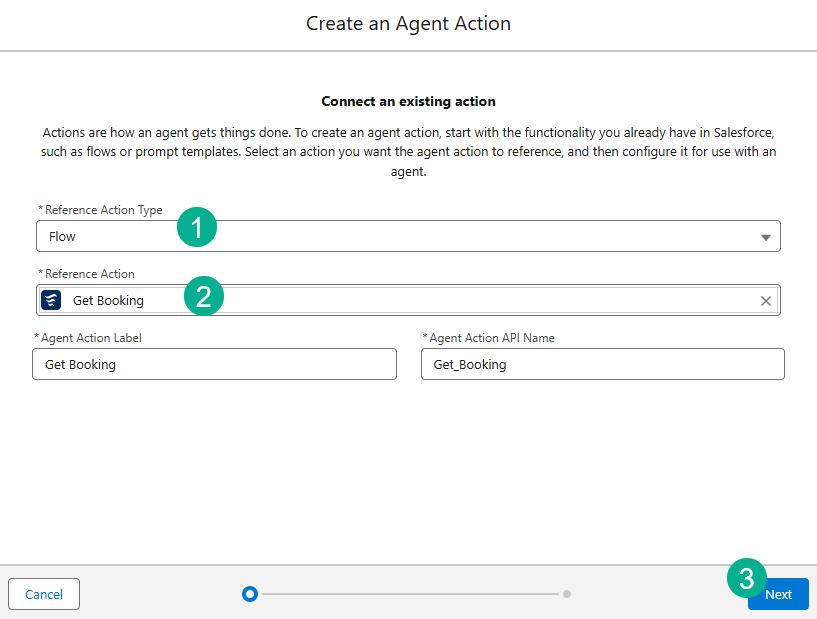
(1) Select the Flow Action Type.
(2) Select Get Booking.
(3) Click Next.

(1) Leave the Instructions as they are.
(2) Enter Retrieve Booking Information.
(3) Select Require Input.
(4) Select Show in Conversation.
(5) Click Finish.
Step III: Create Adjust Booking Action
(1) Click on “This Topic’s Actions”.
(2) Click on New.
(3) Click on “Create New Action”.

(1) Select Flow.
(2) Select Adjust Booking.
(3) Click next.
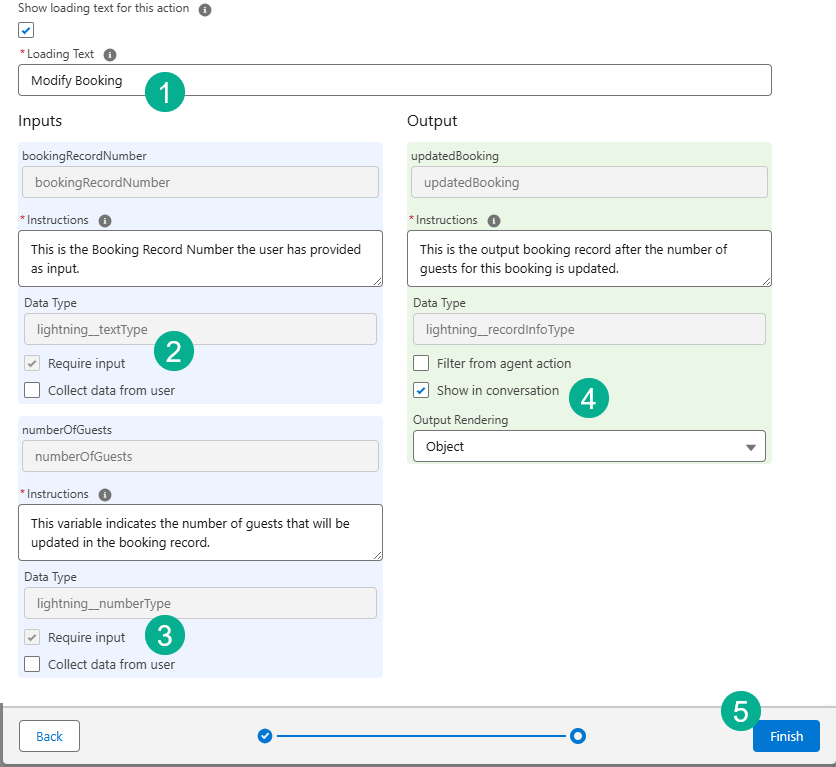
(1) In the Loading Text enter “Modify Booking”.
(2) Select Require Input under bookingRecordNumber.
(3) Select Require Input under NumberofGuests.
(4) Select Show in Conversation.
(5) Select Finish.
Step IV: Create Cancel Booking Action
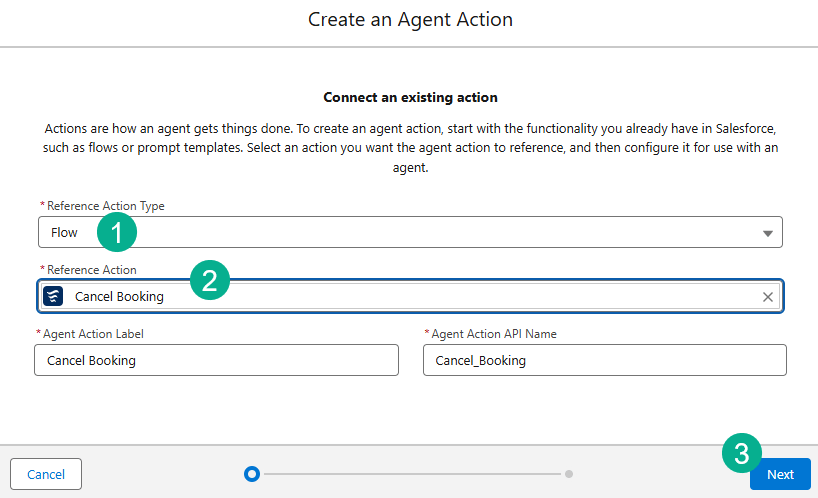
(1) Flow Action Type.
(2) Search for Cancel Booking.
(3) Click Next.

(1) Keep the Agent Action Instructions as they are.
(2) Enter Cancel Reservation.
(3) Select Require Input.
(4) Select Show in Conversation.
(5) Select Finish.
Step V: Update Cancel Booking Action.

Click on Cancel Booking.

Click Edit in Detail Page.
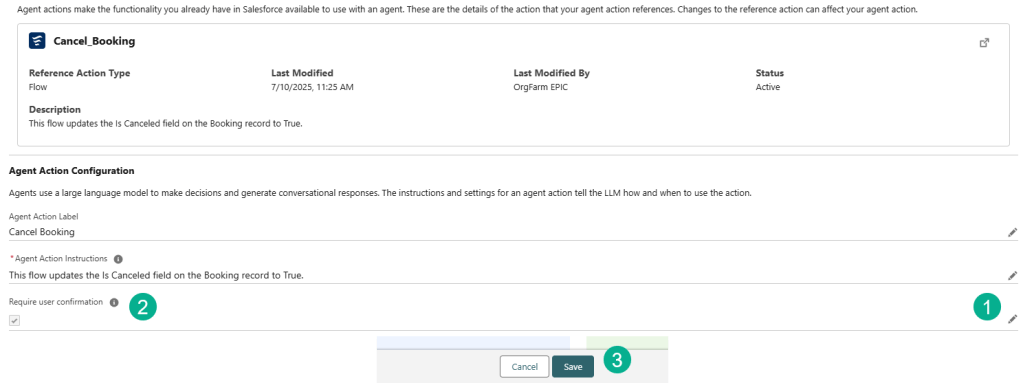
(1) Click on the Pencil.
(2) Check the Require User Confirmation checkbox.
(3) Click Save.
Validate you’ve completed the Challenge.


Yay one more done! Two more to go. Look out for our next blog that covers Challenge #3!
Interested in building a Proof of Concept of an Agent, we can help. Sign up for a free discovery session to build your first Agent. https://howtoagentforce.com/agentforce-agent-poc/
