
In this blog we’ll cover the steps on how you can get access to a demo org to start leveraging the power of AgentForce today!
Salesforce offers a fantastic AgentForce workshop for developers which you can check out here: https://developer.salesforce.com/agentforce-workshop/getting-started/overview

(1) Click on the Self Service Workshop Setup.
(2) And click on the Quick Start link to download the sample org.

(1) At the bottom of the Deploy the Coral Cloud Sample App click on the Get Started for Free button.

(1) You will receive an email in a minute or two looking for you to set your password. Please copy this username for use in the future.
(2) And click on this link.
You will be taken to a screen to enter in your password along with answering a security question.

(1) Enter in your password making sure it has at least 8 characters, 1 letter and 1 number.
(2) Enter it in again. Save your password and user name please!
(3) Select a security question.
(4) Enter in the answer.
(5) And submit the password change.
You may need to connect your new playground to gain access to the Coral Cloud app.

(1) Click Connect Playground
You’ll need to log into your new org so remember to save that User Name and Password in a hand place:
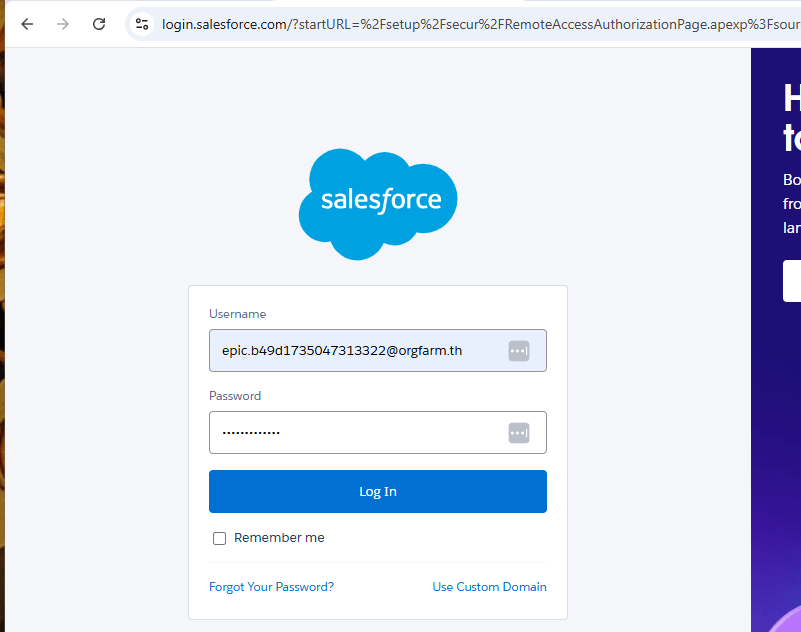
Next you need to allow access to Trailhead to your new org.
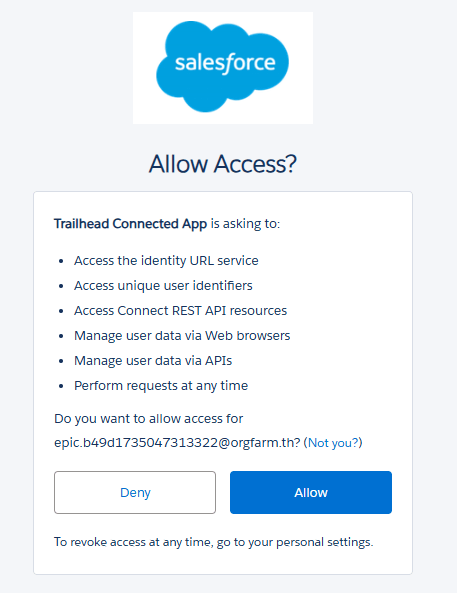
And say “Yes! Save it. button to allow your badges to roll up to your main account.


(1) Your new playground is ready, but don’t put off launching as you only have a few hours to launch the new playground.
(2) Click Launch.
You’ll enter your new Salesforce org woohoo! Now we need to set up the org with sample apps that contain data and functionality to allow you to build Agents.
1.) Install and set up the Coral Cloud base package
First you want to copy this url string and add it to the end of your new Salesforce org URL after lighting.force.com:
/packaging/installPackage.apexp?p0=04tWx0000001WU5IAM
Here’s an example of what you should see. Once this looks right click return on the url to take you to the new url.


(1) The Install Coral Cloud – Base screen will appear. No need to change the settings, keep it as Install for Admins only.
(2) Simply click on the Install button.
(3) FYI this is installing the Coral Cloud – Base app that is a sample resort application for use in your training.
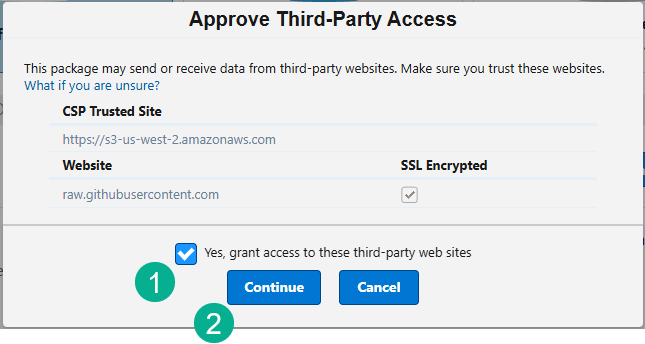
(1) Click on the empty box here titled “Yes, grand access to these third-party web sites”.
(2) And click Continue.

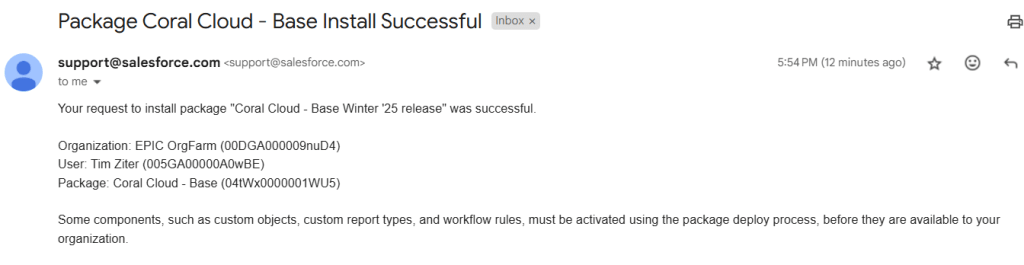
(1) In about 5 minutes the installation will be complete and you can click Done.
You should also receive an email confirmation via Gmail.
1a.) Assign Permission Sets
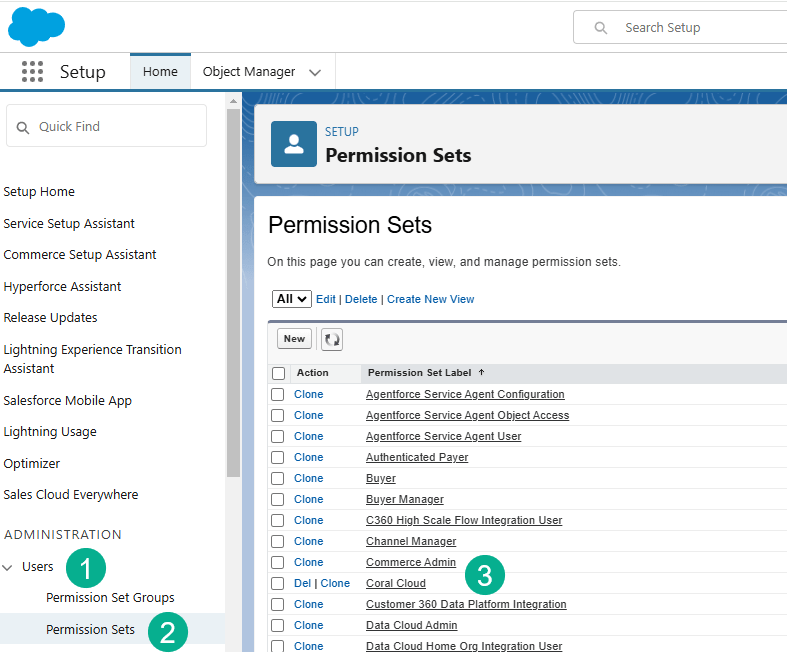
(1) Under Users or search for “Permission Sets”.
(2) Select Permission Sets.
(3) Navigate to Coral Cloud and click on that permission set.

Click on Manage Assignments.

Click on Add Assignment.

(1) Select who should be granted the permissions.
(2) Typically it will be the admin users or the user that was created for this org.

(1) Verify the users.
(2) Click Assign.
1b.) Load Sample data
To complete the projects we’ll want to load sample data into the Coral Cloud org.

(1) Under the nine dots in the upper left hand corner.
(2) Type in “Sample”.
(3) Click on Sample Data Import.

Click on Import Sample Data.

A green success message will appear when completed.
2.) Install and set up the Coral Cloud Experience Cloud site package
Just like the Coral Cloud Base Installed package copy this url string and add it to the end of your new Salesforce org URL after lighting.force.com:
/packaging/installPackage.apexp?p0=04tWx0000001WVhIAM
Here’s an example of what you should see. Once this looks right click return on the url to take you to the new url.

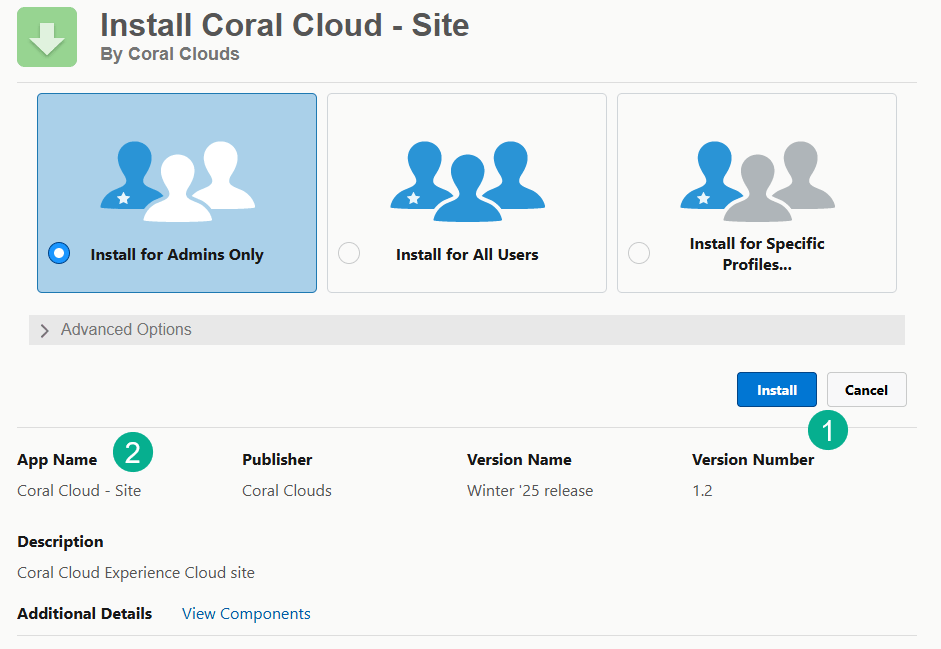
(1) Simply click on Install.
(2) FYI the App we are installing is for the Coral Cloud – Site or Experience Site website.
Error!

(1) You may encounter the error above where it asks you to Enable ExperienceBundle Metadata API in Digital Experiences | Settings.
(2) No problem, click Done.
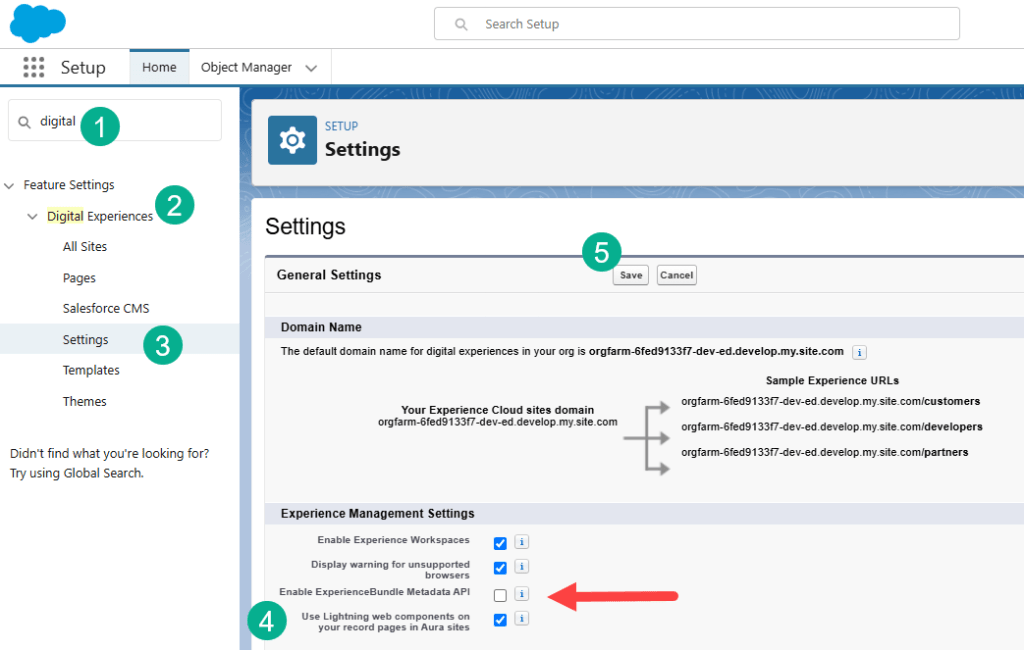
(1) You will still be in Setup. In the search window type “digital”.
(2) Digital Experiences will pop up.
(3) Selecting “Settings”.
(4) Find the Enable ExperienceBundle Metadata API checkbox and select it
(5) And select Save.

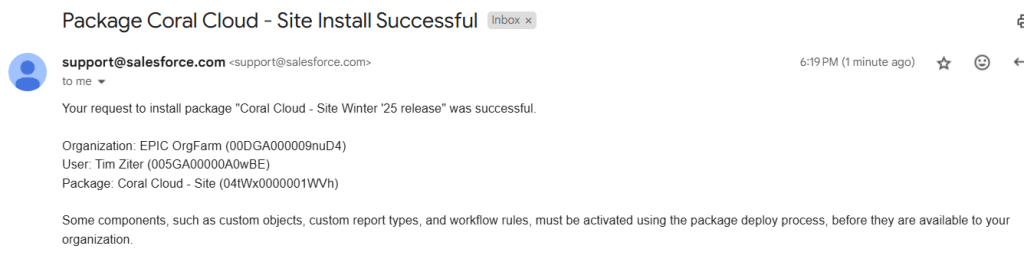
Follow the same steps as above, copying in the installed package url and you should have a successful installation. And you should receive an email confirmation as well.
To check that you have the Coral Cloud Resorts app installed:

(1) In the 9 dot menu in the upper left hand corner.
(2) Type in “coral”.
(3) And you should see Coral Cloud Resorts.
You are all set to start building Prompts and Agents. For those who are interested in doing some more in-depth development we encourage you to follow the “Set up your development environment” steps at the bottom of this link:https://developer.salesforce.com/agentforce-workshop/getting-started/self-service-workshop-setup

We’ll cover that setup in a separate blog as it’s not needed for most users.
We’ll see you in the next blog where we’ll start building Prompts in Prompt Builder!

2 responses to “How to get set up with AgentForce”
[…] minutes.Before we begin you’ll want to review our blog on how to get setup with Agentforce: https://howtoagentforce.com/2024/12/26/how-to-get-set-up-with-agentforce/ which will walk you through how to get access to a demo org that has Agentforce and everything you […]
LikeLike
[…] on how to set up a Agentforce org please review our blog that walks through the process end to end: https://howtoagentforce.com/2024/12/26/how-to-get-set-up-with-agentforce/Step II: Set up your new Agentforce playground orgPart I: Turn on key Einstein […]
LikeLike